
7.09.2009

Washer broken....defcon 4!


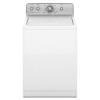
Well, it happened. My washer finally kicked the bucket! For 2 weeks I was dealing with major washer malfunctions. The spin cycle wouldn't complete, so I was wringing the water out of my clothes piece by piece every time I did a load (and saying a few choice *words* in the process!) But, hubby saves the day! I now have a new washer and life is good! This is a picture of it, isn't it cute? (okay, its a washer, I know!) But to me, it is a thing of beauty. It has more cycles, it's quiet and my clothes have never been cleaner (yeah, it's getting deep in here!) If you are totally jealous of my new washer, you can get yours at Home Depot -- it's a Maytag Centennial Commercial top load. And those great little guys from HD delivered the new beautiful washer and hauled away my sad little broken one! Sidebar -- I was looking at those new front load jobs that only take detergent like once a year (is that possible?) but have friends who say they aren't that great, so we decided to go with the good old top loader.

7.08.2009

BIG ways to fill wall space without spending BIG bucks!

I love the impact of all white frames. The different shapes keep it interesting. You could paint (spray paint is your friend, yes, it is!) all those old, dinged up frames you have laying around to get the same look! (photo BHG)

Think beyond the architectural pieces you find at Kirkland's and the like (*yawn*). Look for old iron gates, pieces of fencing, old doors. They are authentic and add lots of character & texture! (photo BHG)

I usually don't like plates on walls, but this arrangement speaks to me! I love that it is very vertical and a lot of plates! You can get inexpensive plates at Homegoods, Marshall's, etc. I think the colors should coordinate, but don't have to be matchy-matchy as shown in the picture. (photo BHG)


How cool is this? These are panels of wallpaper secured at top and bottom with wood dowel rods and hung by ribbon. What an inexpensive way to make a BIG impact on your walls! (photo BHG)

I love this! This is framed fabric. You could also frame scrapbook papers or even giftwrap! (photo BHG)

My own attempt at a photography arrangement!

Great way to display a lot of family photos. I love how the frames don't match, but it still works! (photo BHG)

Another take on displaying lots of family photos; this time, in coordinating frames (for those of us who WANT to be eclectic, but still tend to go toward the matchy-matchy! Is there a help group for this? (photo BHG)

Styling a bookshelf! Yes, it is an art!


(photos courtesy of BHG)

I've been going through all of my internet photo archives and pulling out all the really good stuff to post here! I love styling bookshelves, but it can sometimes be a little tricky trying to figure out which arrangements look best. These pics are some of my favorite examples of great bookshelf arranging. Some practical tips that you can use when arranging your bookshelves:

1. Alternate placing books horizontally and vertically.
2. Use framed pictures as bookends.
3. Put sculptural items, framed pictures, or small framed art on top of horizontal stacks of books and layer photos behind.
4. Pick one tone (as shown in the 2nd pic) for a clean look.
5. Lean plates and/or artwork along the backs of the shelves to anchor them.
6. Use baskets and boxes for storage and to add texture. Offset with smooth curvy vases or urns.
7. Be sure to step back often as you arrange to assess your work and make adjustments.

Cute Ideas to update inexpensive window panels!

Ric-rac design using ribbon! Buttons were used at the intersections for extra embellishment.

Velvet ribbon in 3 shades "stitch-witched" or hot glue'd to inexpensive white panels. You could use grosgrain ribbon too!

Diamond trim. Make diamond template out of cardstock (measure, measure, measure!). Use template to trace pattern in straight line on panel. Paint diamonds with fabric paint. Wouldn't this be cool in Black/White or Chocolate/White?

Free hand sketch branch & leaf design. Paint over design with fabric paint.

Cute idea for kid's room using stencils and fabric paint!  Helpful hint -- use spray adhesive that is repositionable to adhere the stencils to the fabric temporarily.  Use a stencil brush to apply the paint.  Dab all excess paint off the brush until the brush is almost dry.  You may have to do several applications using this technique, but it will ensure that you don't have "bleeding" underneath the stencil.

(photos courtesy of BHG)


Flea Market Decorating - Clever Storage Ideas

What a fun way to repurpose old dresser drawers! You can add any kind of feet to the bottom or use flat as under-the-bed storage. Change out the handles if necessary. You could line the inside in pretty paper.

Architectural salvage turned coat or towel rack. Just add hooks!

(all photos courtesy of BHG)

Antique handles turned into key keepers, etc. Now how genius is that?! I'm ALWAYS looking for my keys and this is a very chic way to organize all those "little things"!

By the way, dumpster diving update - I snagged a low TV console (looks like it's from the '70's!) late last night before trash day. Picture Kendall in track suit lugging 100 lb furniture into the back of her SUV, trying to be stealth! Now I have 4 projects sitting in my garage waiting for my magic....aaah, there are not enough hours in the day!

6.22.2009

Carie's house (post #6) - the family room curtains


The "no sew" curtains we did in the family room.

Carie's house (post #5) - more finishing touches


Pic #1 - We recovered the barstools with the same fabric we used on the curtains and valances. Pic #2 - We added iron pieces on either side of the entry to the breakfast area, to define the space.

Carie's house (post #4) - the bar area


Carie's house (post #3) - the breakfast area


Aah, now my before and afters are in the right order (blondie can learn!) Okay, so this is the breakfast area. Carie bought a new table and chairs (go Carie!) and I snagged a FREE chandelier that my mom-in-law was getting rid of (thanks mom-in-law!) We made the valances out of leftover curtain panels (smooches to Carie's daughter's friend that sews!) and stitch-witched upholstery fabric to the bottom.

Carie's house (post #2) - the little details


Okay, I can't figure out how to add a lot of photos with separate comments (computer-challenged here!) so I'm adding subsequent posts on this project. Bear with me! The art in the first pic is pretty crafty I must say. That is an empty frame from Goodwill ($2!!) and we painted the wall inside the frame and then hung a plaque. Cool, huh? The 2nd photo is the wall over her pass-through. That shelf started out red (we painted black) and the Tuscan plates were $3 a piece at Homegoods. To define her arches, we painted them the same brown that is inside the frame.

First decorating project (for someone other than me!)


Well, my first decorating project for my friend Carie is complete! Here are before and after photos. This is Carie's kitchen. The before pic is 2nd. She really likes Tuscan/Bistro style. We painted the walls mustard with a brown faux "Tuscan" finish.

6.10.2009

Don't forget your local thrift store!

I found a wonderful Goodwill store in my little sleepy suburb! I went in not expecting much and came out with 3 new projects!

Project #1: I bought a cute little piano bench with storage in the seat for $20. The carving on the legs is yummy but it's covered in a mustard velvet ala 1970's! I think I'm going to paint the legs white and cover the seat in a chocolate and white honeycomb print. That's what I envision anyway. We'll see what I come up with at the fabric store!

Project #2: A 3-tier wood table that would be perfect on the back patio as a serving cart for $10! I think I will add casters to the bottom and paint it a fun color!

Project #3: Glass jars w/ lids for $.79 to $1.99. Have you seen those ever-so-perfect pantries in decorating magazines where everything is in labeled cute glass jars? Well, I want to do that in mine too! Maybe it will make my dinky little pantry look a little more respectable! Now my mission is to hit this place every week to get more jars.

Don't forget your local thrift store! There is a treasure trove of decorating for CHEAP! One note on furniture. Make sure the piece is sturdy and is not broken to the point of disrepair. You can change finishes & cover ugly seats. And check back often. These places get new shipments every day!

I will post pics of my thrift store projects....when I can get to them!!

Search my archives for more great ideas!